
A post-final year project DevBlog! An update of what’s changed since the last DevBlog, with a look at what the final product looks like! Along with the release of my Voxel Engine v0.1 found here.
Colourful Terrain
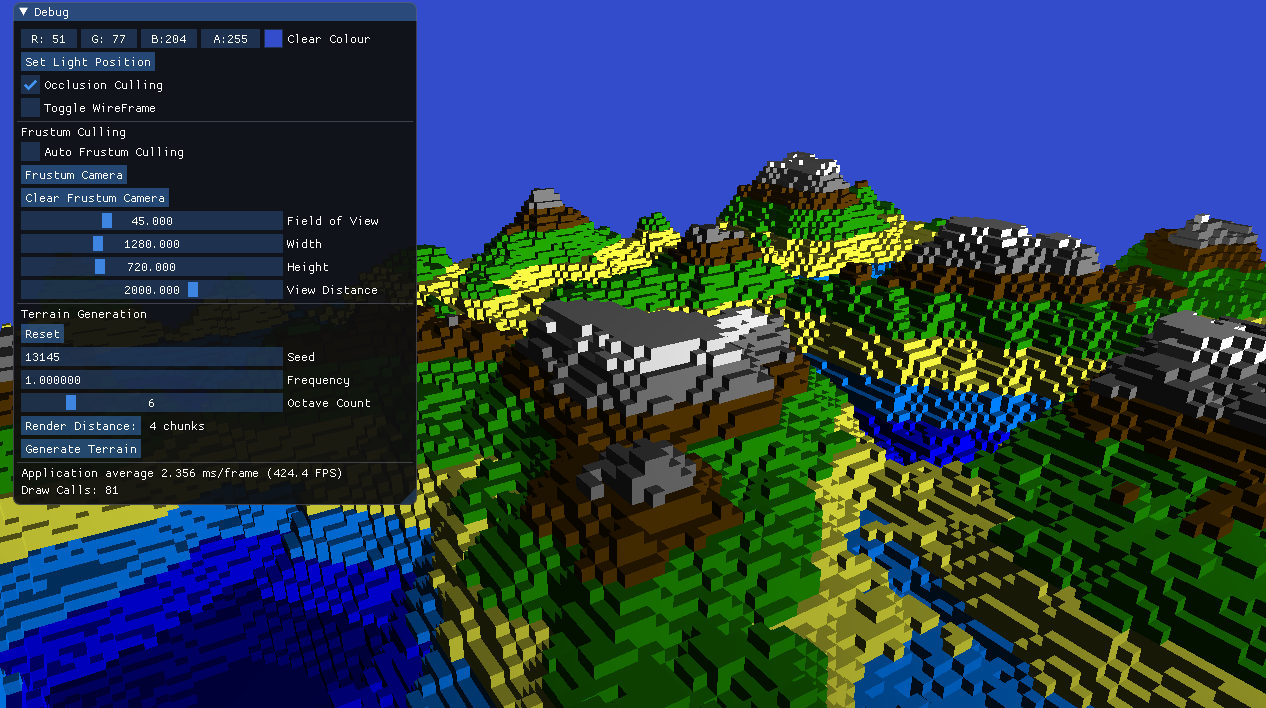
After completing my final features, I decided after many hours of looking at a dull pink terrain to add colours. You can see above the terrain looks a lot better, as it depends on the voxel’s height a colour is then selected. However, I had an issue as my vertex data I used was GLByte ranging from -127 to 127. This limited the colours I could use at the time, whereas after submitting my FYP I realised I just needed a structure containing unsigned GLByte for the colour, as I already was interleaving each chunk VBO. Another issue I fixed was not going off each voxel’s height, instead I was going off the maximum height in that height map’s coordinate. Now below you can see a more vibrant terrain with full RGB colours, and you can see each layer too. These fixes prove to make the terrain look a lot better.
ImGui
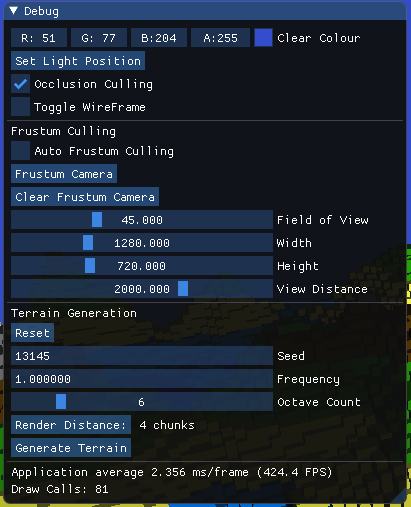
As stated in my goals in the previous DevBlog I wanted to utilise ImGui a graphical interface. So, I looked at all the features I have implemented throughout the project, showcasing them with toggles, buttons and sliders. You can see below the finished product of this. I focused on showcasing the optimisations I have made, allowing the user to toggle on and off optimisations thus showing the performance difference it has. An example of this is occlusion culling as a lot less data is sent to the GPU since most vertices aren’t seen in each chunk. If you’re interested in ImGui it can be found here.
Frustum Culling
Frustum culling was a big area I wanted to add to my graphical interface. The different options I decided to add was auto frustum culling meaning it culls automatically as you move. Frustum camera is a button you can press, and the frustum is then created where the camera is and where it’s looking as seen in the gif below. For fun I decided to add options to alter the frustum like the FOV so you can see a lot more terrain, along with the height/width. There is a view distance too where if auto culling is enabled then the view distance be reduced so you only see chunks that are closer.
Terrain Generation
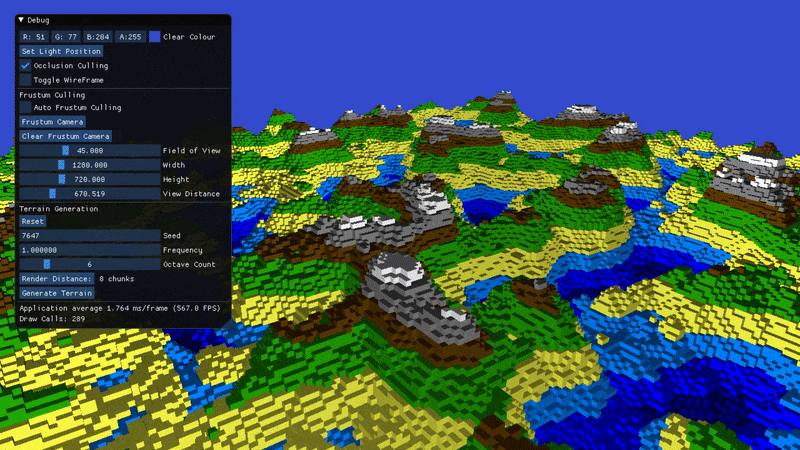
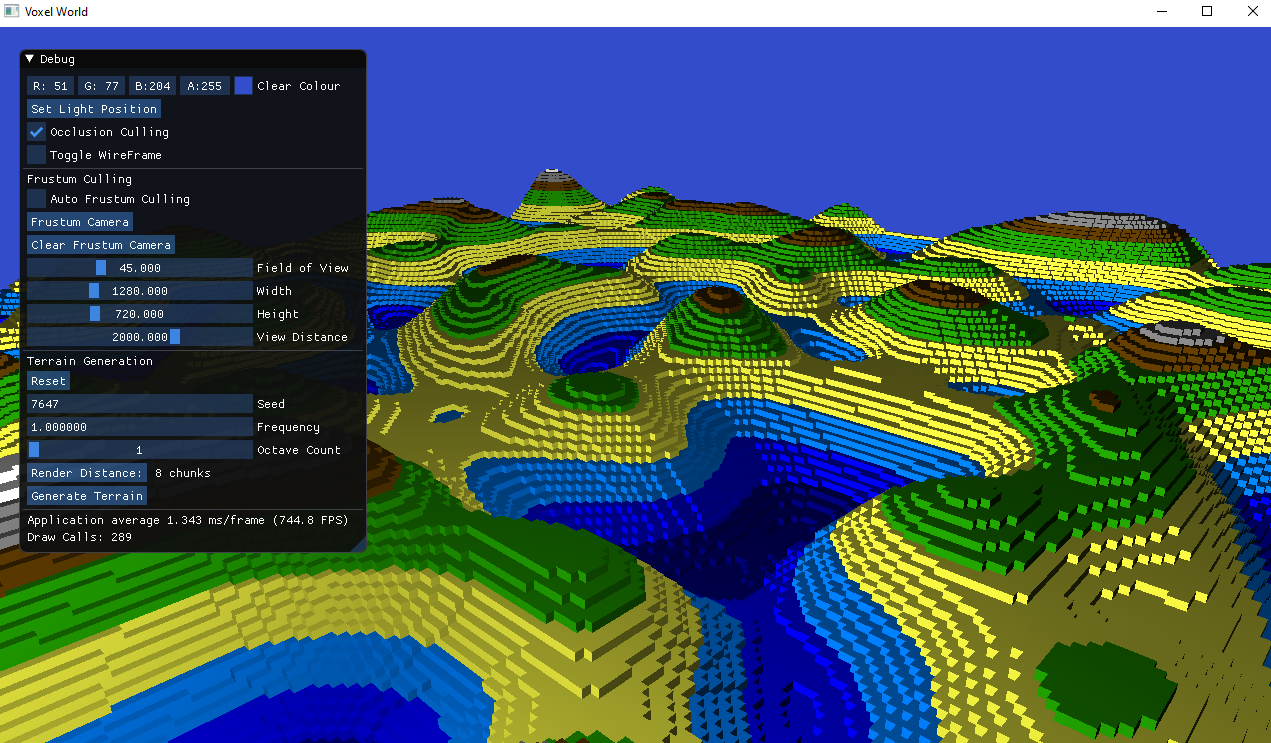
As terrain generation was a big part of the project I wanted to allow the user to change the seed, frequency and octave count. Changing the octave count can show some interesting results as you can see in the image below. There is also a render distance, so you can change how big the map is and how many chunks should be rendered. Changing any of the values of the terrain generation you must generate the terrain again using the button in ImGui.
Helper Features
Some small features I added were the ability to change the light source position to the camera’s current position. I also added clearing the frustum camera if you want to get rid of it and a reset button for the terrain generation. Additionally, I added a text file to the terminal so any user can learn how to use the GUI.
Future Development
This project has proven to be challenging but fun to develop and since I enjoyed graphics programming so much I do plan on continuing development as time goes on as I have just released my first version of the engine. So, keep a close eye out of my future DevBlogs! A few things I will be looking into are:
Goals
- Occlusion Culling between chunks
- Change to using Indices so vertex data can be used multiple times
- Memory optimisations
- In-game shader text editor allowing for fast shader recompile with instant effect
- Adding and removing voxels
- Physics Engine using Bullet3D
- Look into Vulkan API