My final 7th DevBlog of my final year project is here! Unfortunately, I wasn’t able to do my DevBlog last week due to other university deadlines nearing, since then I have been full steam ahead and focused on my FYP. The last two areas I was looking at was multithreading loading and unloading and my final feature frustum culling.
Async loading chunks
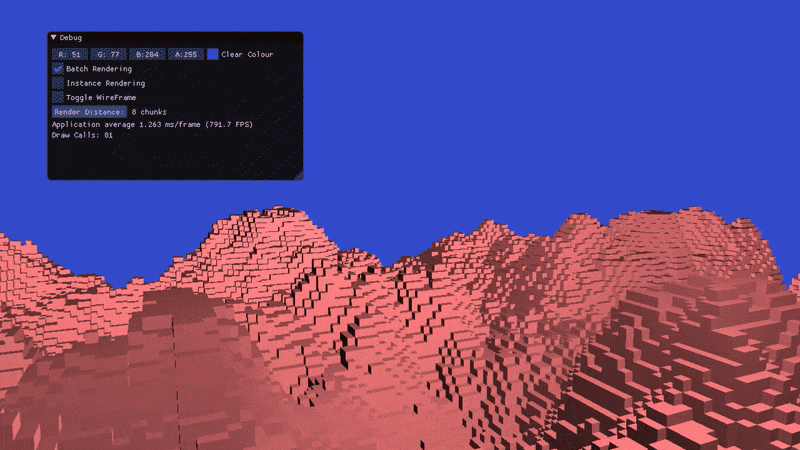
Continuing from my last DevBlog I looked at multithreading loading and unloading which is very similar to how I loaded the chunks at the start of the scene. Upon implementing loading and unloading I realised that I couldn’t do unloading asynchronously because when I delete the chunk OpenGL calls to delete the VAO which OpenGL functionality cannot be called on other threads unless that thread currently has the currently active context. I decided not to go that route because switching contexts has a performance hit every time you do it, so I decided to just delete the chunks on the main thread which still fast anyways. I very quickly got the loading asynchronously working but came into a problem I didn’t realise I had before which was making sure my multithreading was thread safe. What I was doing was accessing the load list to add to the list when the chunk loading is done but I didn’t set a mutex so when a thread accesses the list it locks it so no other thread can access the list till that thread is done and unlocks. This made my multithreading thread safe with no more crashes that could potentially happen if two threads try to access data at the same time resulting in a crash. After that multithreading for loading while moving was done as you can see below.
Frustum Culling
What is frustum culling? Well it is where we only render everything that the camera(player) can see and everything else isn’t rendered. It is a very good technique of culling such as big open worlds like GTA 5 and rendering everything in the vast world would show awful performance so only render what the player sees, however in some cases calculating all the objects that are inside and discarding the rest can show low performance due to how long it takes to calculate what’s inside the frustum and what’s not.
Frustum culling can be a bit tedious, so I researched a bit and found this great resource. Starting off with my first iteration I needed to extract the planes and as you can see at first I needed to visualise how my frustum worked and if it was right or not and you can see it wasn’t with it just being a triangle but it was a start so I knew the frustum wasn’t being calculated correctly.

The second iteration was a bit better since it resembles more of a frustum, of course its still only 2D but I realised from the last iteration getting the near and far width and height wasn’t done correctly and now you can see it look more like a triangle with the top missing which is basically what a frustum looks like since peak of the triangle is where the camera is. The near plane is the screen the player sees and the cone from there to the near plane is what you see.

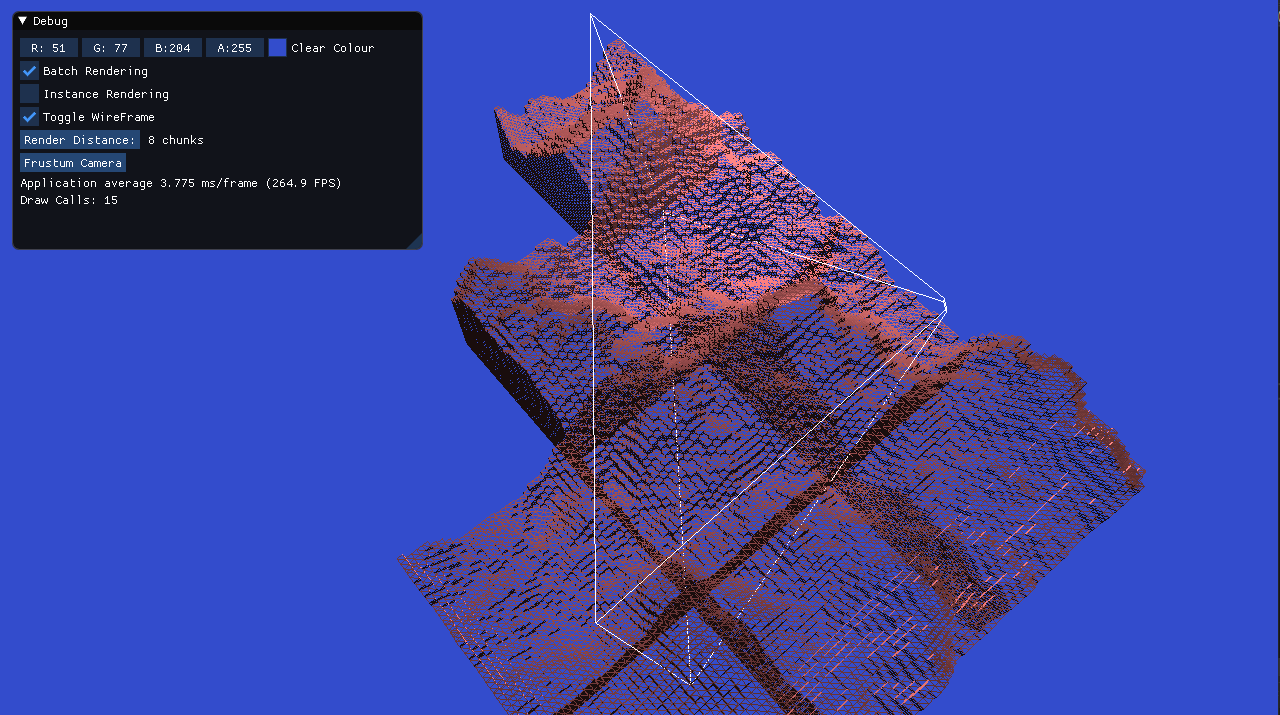
After a few head scratches I finally got a proper frustum! How’d I get it? Well after a lot of tweaking and figuring it all out of getting the correct width and height and centres of the near and far planes I could calculate all 4 points of the near and far planes by calculating the x direction with the cross product of the z direction vector and up vector to get the right vector and normalising it. From there I could get the up direction by doing the cross product of the z direction vector and new x direction. I then calculated the near and far centres by multiplying the z direction by the near/far distance. Using the near centre and far centre I could then use the up vector and right vector to get all 8 points I need to calculate all 6 planes of the frustum and Tada! A properly calculated frustum. Now I am still new to frustum culling so in the future I will be doing more research and deeper learning to understand the maths behind as I feel I would have a better understanding overall. However, I did still have two issues to solve, which were when I do a frustum check on my current position the frustum is rendered at the wrong position and looking up and down the frustum goes weird and near plane is crooked.
	//X axis of camera with given "up" vector and Z dir
	glm::vec3 X = glm::normalize(glm::cross(dir, up));

	//Y axis of camera is the cross product of Z dir and X dir
	glm::vec3 Y = glm::cross(dir, X);

	//Compute the centres of the near and far planes
	nearCentre = pos + (dir * m_nearDistance);
	farCentre = pos + (dir * m_farDistance);

	//Calculate the 4 corners of the frustum on the near plane
	nearTopLeft = nearCentre + (Y * m_nearHeight) - (X * m_nearWidth);
	nearTopRight = nearCentre + (Y * m_nearHeight) + (X * m_nearWidth);
	nearBottomLeft = nearCentre - (Y * m_nearHeight) - (X * m_nearWidth);
	nearBottomRight = nearCentre - (Y * m_nearHeight) + (X * m_nearWidth);

	//Calculate the 4 corners of the frustum on the far plane
	farTopLeft = farCentre + (Y * m_farHeight) - (X * m_farWidth);
	farTopRight = farCentre + (Y * m_farHeight) + (X * m_farWidth);
	farBottomLeft = farCentre - (Y * m_farHeight) - (X * m_farWidth);
	farBottomRight = farCentre - (Y * m_farHeight) + (X * m_farWidth);

The fourth iteration had me confused on by the frustum was rendering at the wrong position as the frustum should render at the camera position. After a few hours I realised that in my shader when rendering I pass in an offset for each chunk and for the lines I was rendering I wasn’t passing in an offset as it didn’t need one making the offset uninitialised and for some strange reason making it offset. However, I fixed that issue by creating another shader specifically for rendering the lines and changed the render colour to white so it’s more noticeable.
My fifth iteration was tackling looking up and down that made the frustum go all weird. In the third iteration I explain how I calculated the 8 points but at the time of implementation I didn’t calculate the up and right direction and only used a static vector up (0,1,0) and right vector of (1,0,0). This would work if there wasn’t mouse input to move the camera around. So, I calculated the X and Z direction as seen above and now the frustum was working perfectly.

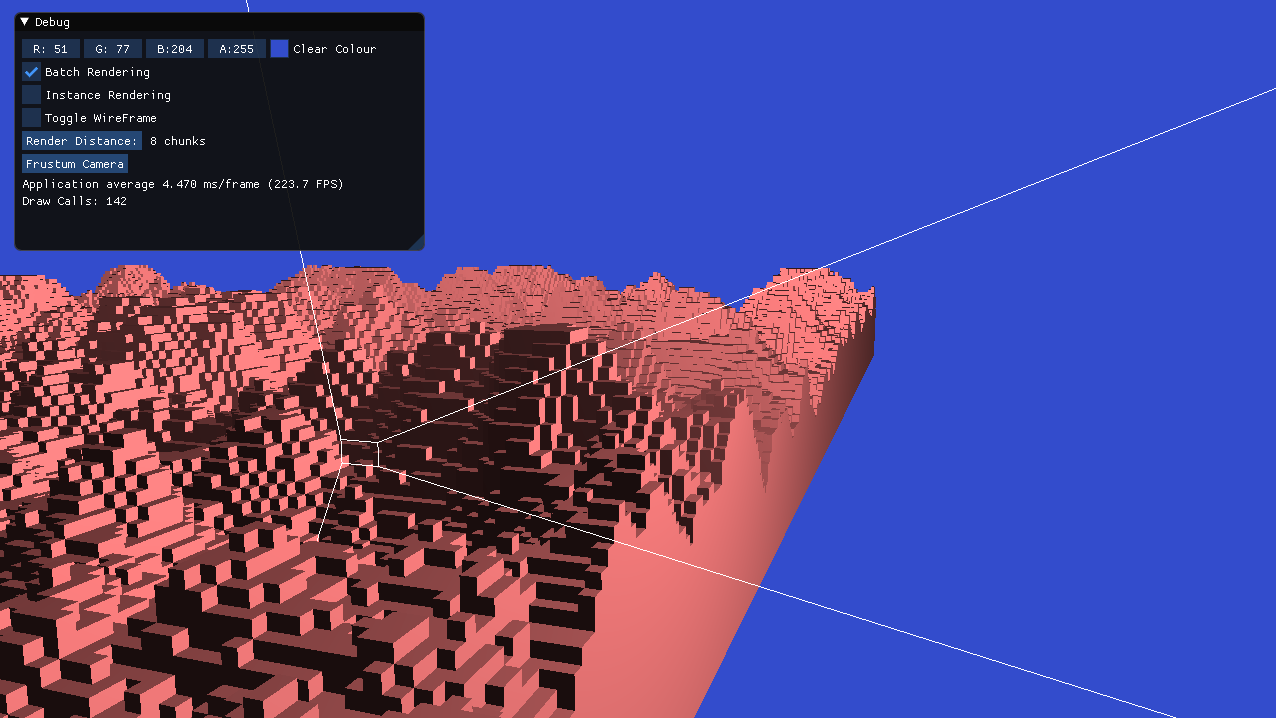
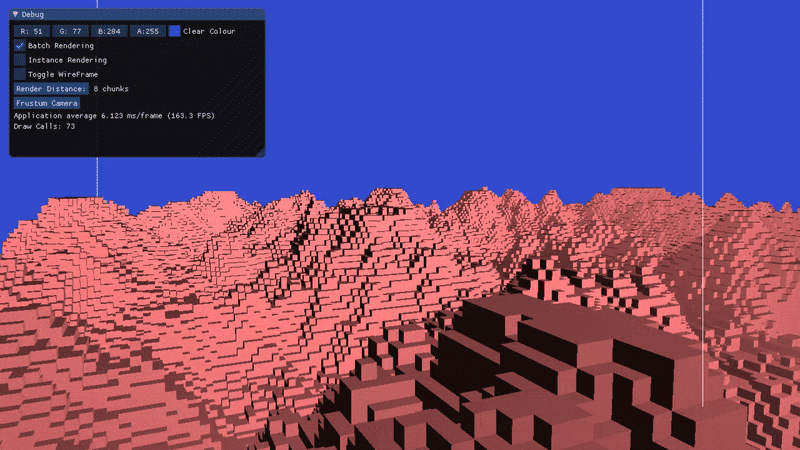
On my sixth and final iteration I looked at rendering everything inside the frustum. How did I do this? Well I got the position of each chunk that could “potentially” be rendered and check the distance of each point of the chunk with each plane and if the distance between the plane is greater than 0 then its inside the frustum. Otherwise its outside the frustum so don’t render it. There we go! In the future I will be optimising the checks if its inside or not but for now it does a very good job as you can see in the gif(Ignore the white lines as I have exaggerated the aspect ratio to show the chunks being rendered within the frustum and removed when it goes outside the frustum.
Overview
These past two weeks I have managed to get my last two features I proposed in my original proposal, so overall I am happy where I am at and over the next few days my goals are:
Goals
- Cleanup code/add comments
- Bugfixes
- ImGui(Graphical interface) - Optimisastion toggles e.g. frustum culling and occlusion culling, FOV, changing seed, changing terrain config, frustum setting and change lighting position.